
服务网关 Zuul
前言
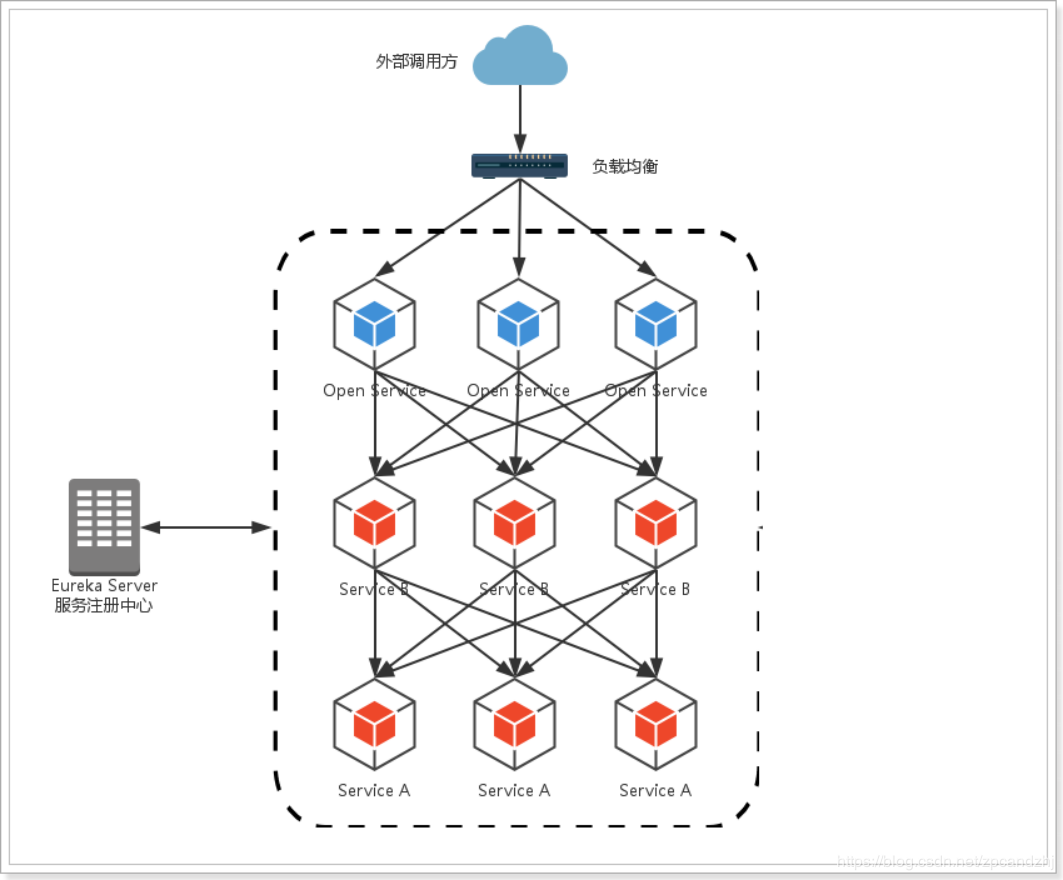
通过前面的学习,使用Spring Cloud实现微服务的架构基本成型,大致是这样的:
-
我们使用Spring Cloud Netflix中的Eureka作为服务注册中心完成服务注册与发现;而服务间通过Feign和Ribbon实现服务的消费以及负载均衡;通过Spring Cloud Config实现了应用多环境的外部化配置以及版本管理。为了使得服务集群更为健壮,使用Hystrix的融断机制来避免在微服务架构中个别服务出现异常时引起的故障蔓延。
-
思考:在该架构中,我们的服务集群包含:内部服务Service A和Service B,他们都会注册与订阅服务至Eureka Server,而Open Service是一个对外的服务,通过负载均衡公开至服务调用方。我们把焦点聚集在对外服务这块,这样的实现是否合理,或者是否有更好的实现方式呢?
这样架构存在着一些不足:
- 首先,破坏了服务无状态特点。
- 为了保证对外服务的安全性,我们需要实现对服务访问的权限控制,而开放服务的权限控制机制将会贯穿并污染整个开放服务的业务逻辑,这会带来的最直接问题是,破坏了服务集群中REST API无状态的特点。
- 从具体开发和测试的角度来说,在工作中除了要考虑实际的业务逻辑之外,还需要额外可续对接口访问的控制处理。
- 其次,无法直接复用既有接口。
- 当我们需要对一个既有的集群内的接口,实现外部访问时,我们不得不通过在原有接口上增加校验逻辑,或增加一个代理调用来实现权限控制,无法直接复用原有的接口。
面对类似上面的问题,可以使用服务网关解决:
-
为了解决上面这些问题,我们需要将权限控制、日志收集这样的东西从我们的服务单元中抽离出去,而最适合这些逻辑的地方就是处于对外访问最前端的地方,我们需要一个更强大一些的均衡负载器 服务网关。
-
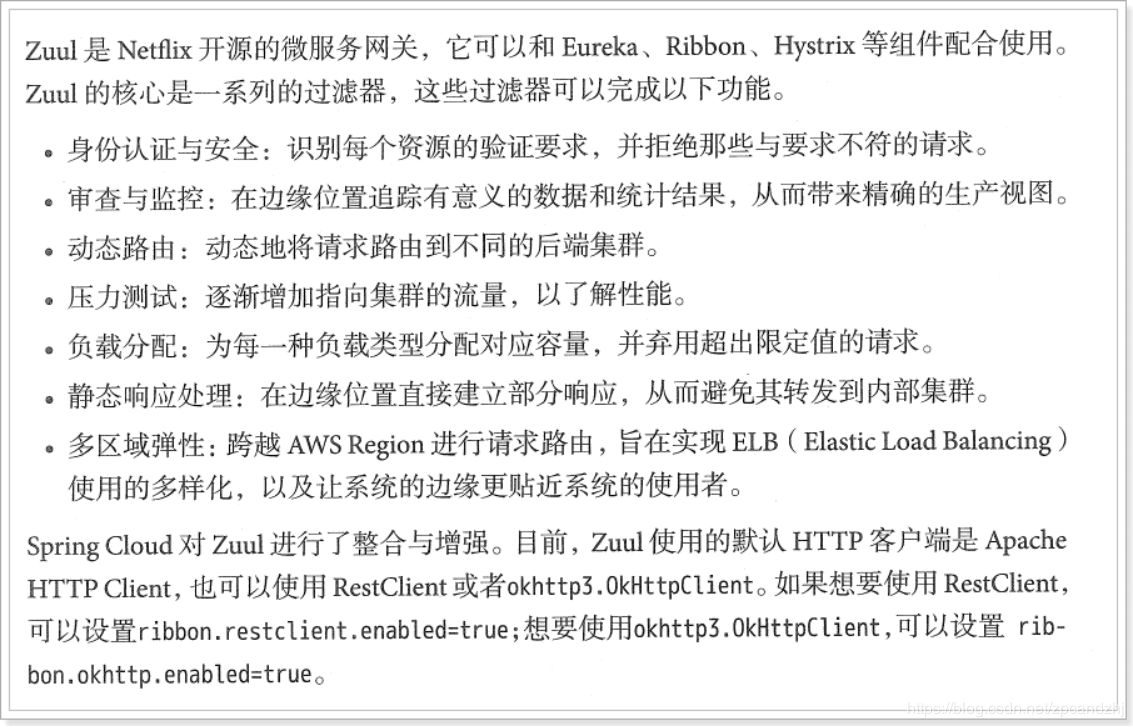
服务网关是微服务架构中一个不可或缺的部分。通过服务网关统一向外系统提供REST API的过程中,除了具备服务路由、负载均衡功能之外,它还具备了权限控制等功能。Spring Cloud Netflix中的Zuul就担任了这样的一个角色,为微服务架构提供了前门保护的作用,同时将权限控制这些较重的非业务逻辑内容迁移到服务路由层面,使得服务集群主体能够具备更高的可复用性和可测试性。
Zuul简介
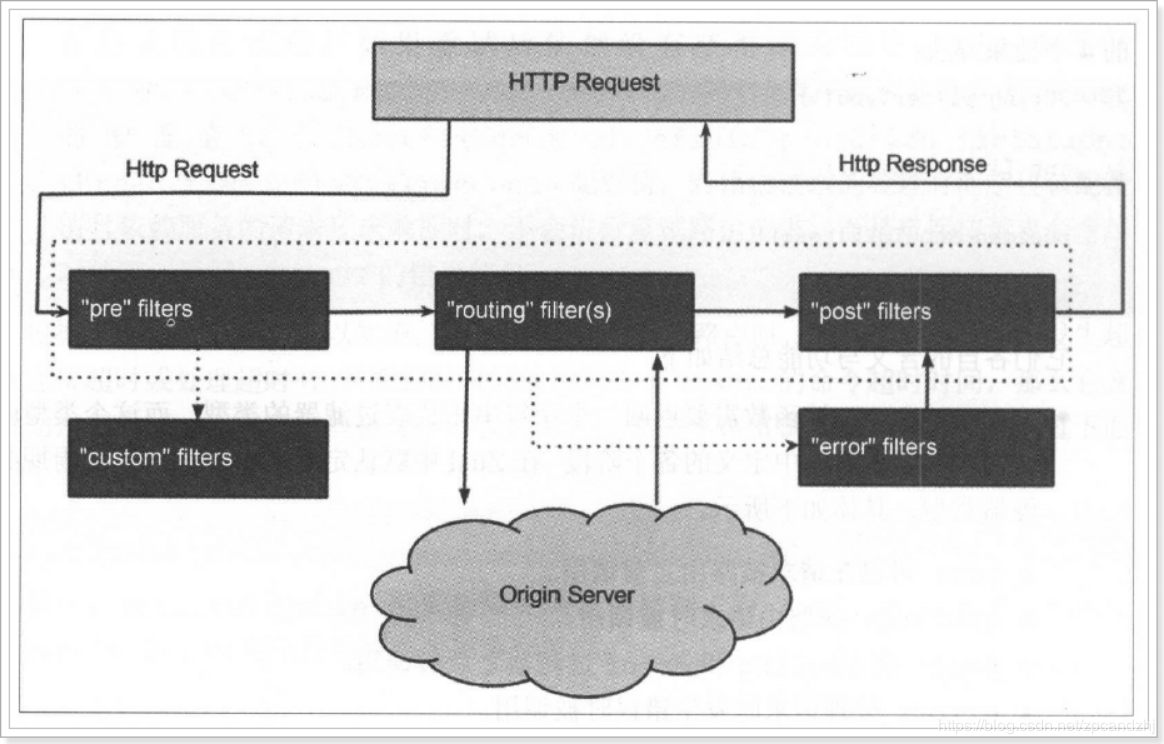
Zuul架构
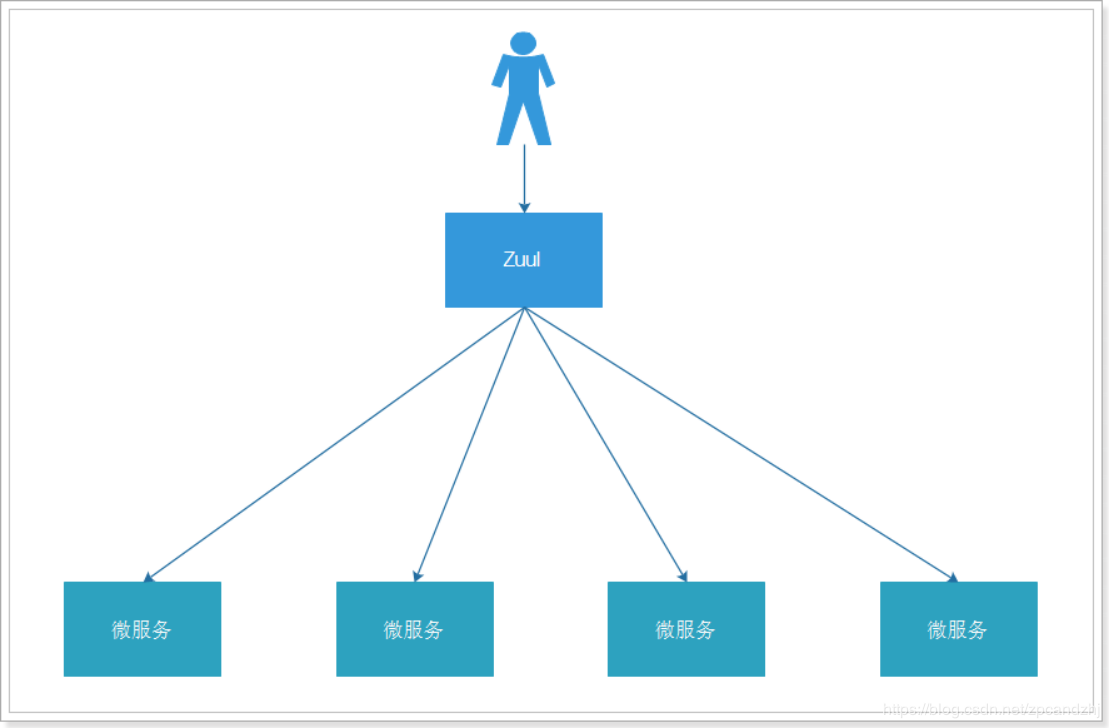
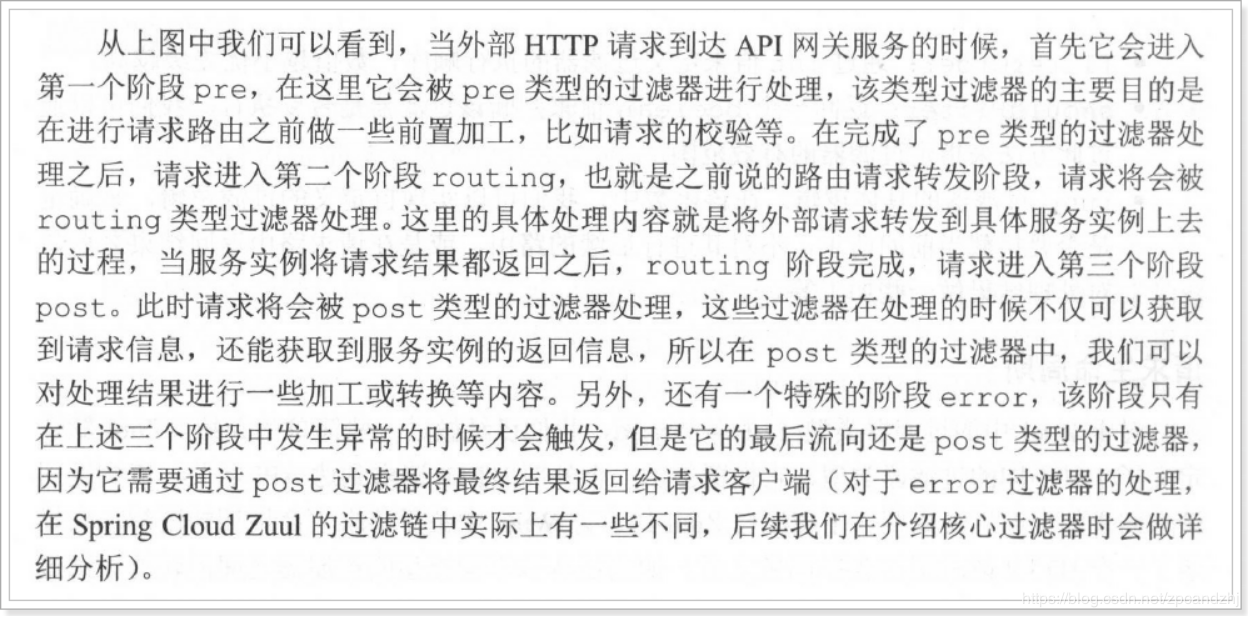
从架构图中可以看出,客户端请求微服务时,先经过Zuul之后再请求,这样就可以将一些类似于校验的业务逻辑放到zuul中完成。 而微服务自身只需要关注自己的业务逻辑即可。当然在Zuul上层也可以搭建Nginx、F5等负载均衡设施。
实例
新建一个网关服务项目。其它服务继续使用之前的Eureka实例。
pom文件
<project xmlns="http://maven.apache.org/POM/4.0.0"
	xmlns:xsi="http://www.w3.org/2001/XMLSchema-instance"
	xsi:schemaLocation="http://maven.apache.org/POM/4.0.0 http://maven.apache.org/xsd/maven-4.0.0.xsd">
	<modelVersion>4.0.0</modelVersion>
	<groupId>com.hu</groupId>
	<artifactId>EurekaZuul</artifactId>
	<version>0.0.1-SNAPSHOT</version>

	<parent>
		<groupId>org.springframework.boot</groupId>
		<artifactId>spring-boot-starter-parent</artifactId>
		<version>2.2.7.RELEASE</version>
	</parent>

	<dependencyManagement>
		<dependencies>
			<!-- 导入Spring Cloud的依赖管理 -->
			<dependency>
				<groupId>org.springframework.cloud</groupId>
				<artifactId>spring-cloud-dependencies</artifactId>
				<version>Hoxton.SR4</version>
				<type>pom</type>
				<scope>runtime</scope>
			</dependency>
		</dependencies>
	</dependencyManagement>
	<dependencies>
		<!--整合zuul网关 -->
		<dependency>
			<groupId>org.springframework.cloud</groupId>
			<artifactId>spring-cloud-starter-netflix-zuul</artifactId>
			<version>2.2.2.RELEASE</version>
		</dependency>
	</dependencies>

	<build>
		<plugins>
			<plugin>
				<groupId>org.springframework.boot</groupId>
				<artifactId>spring-boot-maven-plugin</artifactId>
			</plugin>
		</plugins>
	</build>
</project>
Main方法
@EnableZuulProxy
@SpringBootApplication
public class ZuulApp {
	public static void main(String[] args) {
		SpringApplication.run(ZuulApp.class, args);
	}
}
application.xml配置文件
server:
  port: 8080 #服务端口
spring:
  application:
    name: app-zuul-gateway #指定服务名
zuul:
  routes: #定义服务转发规则
    user-service: #user-service这个名字任意取的
      path: /user-service/** #配置请求URL的请求规则
      url: http://127.0.0.1:8010 #真正的微服务地址,path匹配的请求都转发到这里
测试
运行并访问服务网关。
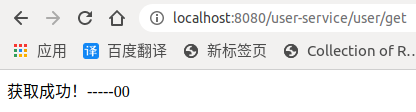
从url中可以看出,该次请求使用的是服务网关的地址以及配置好的user-service路径。
整合Eureka
我们已经通过了URL映射,访问到了用户微服务。这样做会存在一个问题,就是,如果用户微服务的地址发生了改变怎么办? 很自然的能够想到,不应该配置具体的url而是走Eureka注册中心获取地址。
添加依赖
<dependency>
    <groupId>org.springframework.cloud</groupId>
    <artifactId>spring-cloud-starter-netflix-eureka-client</artifactId>
    <version>2.2.2.RELEASE</version>
</dependency>
application.xml配置文件
server:
  port: 8080 #服务端口
spring:
  application:
    name: app-zuul-gateway #指定服务名
zuul:
  routes: #定义服务转发规则
    user-service: #item-service这个名字任意取的
      path: /user-service/** #配置请求URL的请求规则
      #url: http://127.0.0.1:8010 #真正的微服务地址,path匹配的请求都转发到这里
      serviceId: app-user
    consumer-service:
      path: /consumer-service/**
      serviceId: app-consumer

###服务注册到eureka注册中心的地址
eureka:
  client:
    service-url:
           defaultZone: http://hu:12340@127.0.0.1:8000/eureka/,http://hu:12340@127.0.0.1:9000/eureka/
###因为该应用为服务提供者,是eureka的一个客户端,需要注册到注册中心
    register-with-eureka: true
###是否需要从eureka上检索服务
    fetch-registry: true
  instance:
      prefer-ip-address: true #将自己的ip地址注册到Eureka服务中
      ip-address: 127.0.0.1
      instance-id: ${spring.application.name}###${server.port} #指定实例id
测试
启动后,网关服务成功注册到Eureka注册中心中。

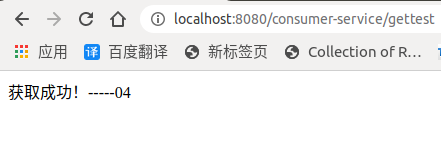
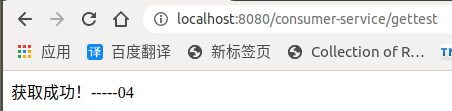
访问消费服务中的正常接口。由于消费配置了负载均衡,每次请求的用户服务的接口可能会不一样。
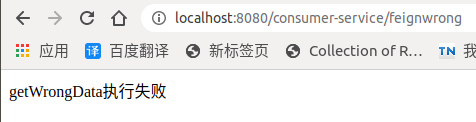
访问消费服务中的容错保护的接口。容错保护能正常使用。
过滤器
过滤器是Zuul的重要组件。ZuulFilter是一个抽象类,其实现类需要实现4个方法:
-
shouldFilter:返回一个Boolean值,判断该过滤器是否需要执行。返回true执行,返回false不执行。
-
run:过滤器的具体业务逻辑。
-
filterType:返回字符串代表过滤器的类型
- pre:请求在被路由之前执行
- routing:在路由请求时调用
- post:在routing和errror过滤器之后调用
- error:处理请求时发生错误调用
- filterOrder:通过返回的int值来定义过滤器的执行顺序,数字越小优先级越高。
执行流程
实例
添加过滤器类
@Component
public class MyZuulFilter extends ZuulFilter {
public boolean shouldFilter() {
return true;
}
public Object run() throws ZuulException {
RequestContext requestContext = RequestContext.getCurrentContext();
HttpServletRequest request = requestContext.getRequest();
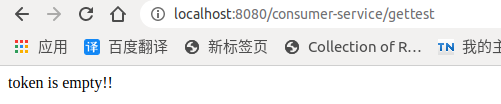
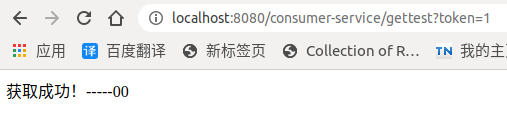
String token = request.getParameter("token");
if(StringUtils.isEmpty(token)) {
requestContext.setSendZuulResponse(false); // 过滤该请求,不对其进行路由
requestContext.setResponseStatusCode(401); // 设置响应状态码
requestContext.setResponseBody(" token is empty!!"); // 设置响应状态码
return null;
}
return null;
}
@Override
public String filterType() {
return "post";
}
@Override
public int filterOrder() {
return 0;
}
}
运行测试:
该方法可在实际场景中进行所需要的逻辑配置,此处仅做参考。并不表示过滤器的功能只是这样。
zuul配置详解
指定服务ID
zuul:
routes: #定义服务转发规则
#第一种:
user-service: #item-service这个名字任意取的
path: /user-service/** #配置请求URL的请求规则
#url: http://127.0.0.1:8010 #真正的微服务地址,path匹配的请求都转发到这里
serviceId: app-user
#第二种:直接使用 服务serviceId: 映射路径
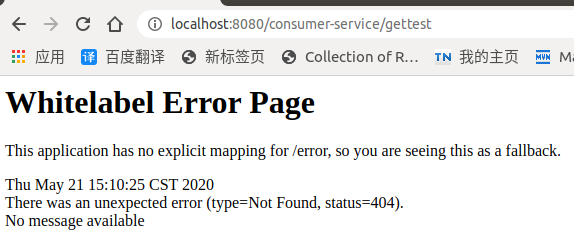
app-consumer: /zuul-service/** #表示将zuul-service路径指向app-consumer服务
注:在使用配置 app-consumer: /zuul/** 时,访问 localhost:8080/zuul/gettest 并不能访问成功。可能是由于 /zuul/ 路径在内部被使用了,无法映射。换个路径名就好了,如 /zoo/ 也能访问,可能 /zuul/ 是一个特例。
忽略指定服务
使用 zuul.ignored-services ,可指定忽略的服务(多个服务用 , 分隔),被忽略的服务不会被网关代理。
zuul:
  ignored-services: app-user,app-consumer  #忽略用户服务和消费服务
  #ignored-services:  '*' #表示忽略所有服务。使用单引号包括起来,否则读取配置时会报错
指定代理服务
若只想为某个服务做代理,不为其他服务做代理。则可忽略掉所有服务,然后为需要代理的服务配置代理规则。
zuul:
  ignored-services:  '*' #使用单引号包括起来,否则读取配置时会报错
  routes: #定义服务转发规则
    user-service: #item-service这个名字任意取的
      path: /user-service/** #配置请求URL的请求规则
      #url: http://127.0.0.1:8010 #真正的微服务地址,path匹配的请求都转发到这里
      serviceId: app-user
    #app-user: /zuul-service/**
忽略到所有服务后,使用 localhost:8080/app-user/user/get 无法成功向用户服务发出请求,因为以上配置表示只代理 user-service 服务。即只有 localhost:8080/user-service/user/get 能够成功被代理。
面向服务配置
在配置文件中,使用 url 配置服务映射路径,不会作为HystrixCommand执行;同时也不能使用Ribbon负载均衡。这样就破坏了Hystrix和Ribbon的特性。所以需要使用 serviceId 来配置服务映射路径。
路由前缀
路由前缀理解起来比较绕,在网上找了很多资料,也设计了很多场景来验证。得出的结论如下(如有理解错误,请帮忙指正):
- prefix :前缀,当请求匹配前缀时会进行代理
- strip-prefix :代理前缀默认会从请求路径中移除
zuul.prefix:通过prefix设置请求前缀,有该前缀的请求才会被网关代理。如果对网关的请求路径端口号后没有该前缀,则会造成请求失败。因为该网关并不会代理该路径。
strip-prefix可设置在zuul后(zuul.strip-prefix),也可设置在配置规则后(zuul.routes.consumer-service.strip-prefix)。
zuul.strip-prefix:默认为true。表示请求路径在转发时,会去掉前缀。
zuul:
  prefix: /user
  strip-prefix: true
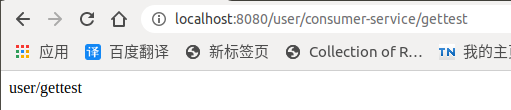
若请求路径为 http://localhost:8080/user/consumer-service/gettest ,
对消费服务实际发出的请求为 http://localhost:8020/gettest 。并不会加入前缀 /user 。
zuul.strip-prefix:为false时。表示请求路径在转发时,会加上该前缀。
zuul:
  prefix: /user
  strip-prefix: true
若请求路径为 http://localhost:8080/user/consumer-service/gettest ,
对消费服务实际发出的请求为 http://localhost:8020/user/gettest 。
zuul.routes.consumer-service.strip-prefix:为true时。与注释掉没区别。
zuul.routes.consumer-service.strip-prefix:为false时。表示取消对该路径(此处为 consumer-service )的转发。网上资料说通过该设置关闭移除功能。
若请求路径为 http://localhost:8080/user/consumer-service/gettest ,由于该请求路径有前缀 /user 所以会被网关代理到;但是由于在 consumer-service 的配置规则中,设置了 ` strip-prefix` 为false,该路径不会被网关转发(即网关虽然会拦截到,但不会对消费服务发出请求)。
验证结论
修改网关配置文件,添加前缀 /user 。
zuul:
  prefix: /user #前缀
  strip-prefix: true #该值默认为true 设不设置一样
修改拦截器 MyZuulFilter ,添加请求路径打印:
@Component
public class MyZuulFilter extends ZuulFilter {
	public boolean shouldFilter() {
		return true;
	}
	public Object run() throws ZuulException {
		RequestContext requestContext = RequestContext.getCurrentContext();
		HttpServletRequest request = requestContext.getRequest();
		System.out.println(request.getRequestURI());
		return null;
	}
	@Override
	public String filterType() {
		return "post";
	}
	@Override
	public int filterOrder() {
		return 0;
	}
}
运行并访问 http://localhost:8080/consumer-service/gettest :
控制台并没有无相关输出。
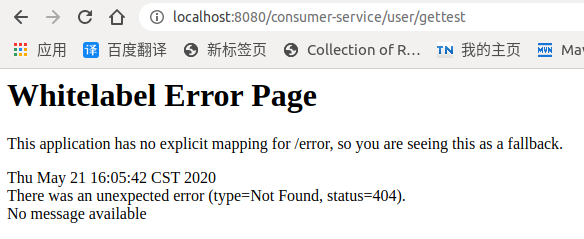
添加前缀访问 http://localhost:8080/user/consumer-service/gettest :
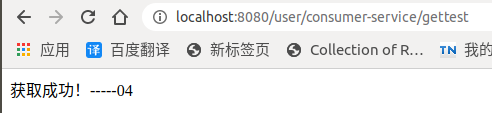
控制台打印:
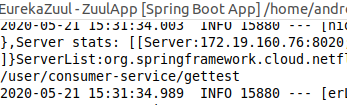
从返回的数据可以看出,从网关发出的请求对应的是消费服务中的 /gettest 路径,并没有加上前缀。
修改网关配置文件,添加前缀 /user ,添加 strip-prefix 为false。
zuul:
  prefix: /user
  strip-prefix: false #请求转发时,加上前缀
修改消费服务EurekaConsumer的Controller,添加一个请求路径 user/gettest 。若假设 strip-prefix: false 表示会在转发时加上前缀 /user ,所以在消费服务中添加一个对应的接口;这样可以通过返回的结果判断请求访问的是消费服务中的哪个路径,从而判断是否会带入前缀。
	@RequestMapping("gettest")
	public String getUserInfoTest() {
		return restTemplate.getForObject("http://app-user/user/get", String.class);
	}
	@RequestMapping("user/gettest")
	public String prefixTest() {
		return "user/gettest";
	}
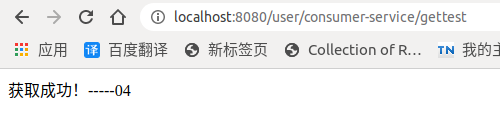
运行并访问 http://localhost:8080/user/consumer-service/gettest :
控制台打印(由于打印和之前控制台除了时间之外一样,直接使用之前的控制台打印图片):
从返回的数据可以看出,该请求对应的是消费服务的 user/gettest 路径,请求路径被加上了前缀 /user 。
修改网关配置文件,添加前缀 /user ,添加 strip-prefix 为true,消费服务配置规则添加 strip-prefix 为true。
zuul:
  prefix: /user
  strip-prefix: true #该值默认为true 设不设置一样
  routes: #定义服务转发规则
    consumer-service:
      path: /consumer-service/**
      serviceId: app-consumer
      strip-prefix: true #设不设置一样
运行并访问 http://localhost:8080/user/consumer-service/gettest :
控制台打印(由于打印和之前控制台除了时间之外一样,直接使用之前的控制台打印图片):
都为true,结果不想而知。没什么好说的。
修改网关配置文件,添加前缀 /user ,添加 strip-prefix 为true,消费服务配置规则添加 strip-prefix 为false。
zuul:
  prefix: /user
  strip-prefix: true #该值默认为true 设不设置一样
  routes: #定义服务转发规则
    consumer-service:
      path: /consumer-service/**
      serviceId: app-consumer
      strip-prefix: false #表示取消该功能
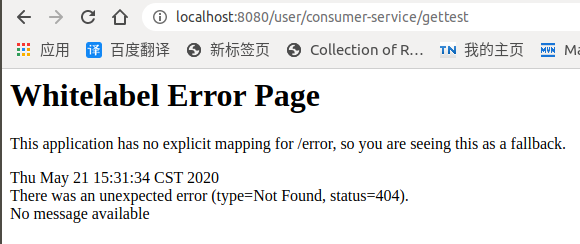
运行并访问 http://localhost:8080/user/consumer-service/gettest :
控制台打印(由于打印和之前控制台除了时间之外一样,直接使用之前的控制台打印图片):
从运行结果可以看出,请求路径失败;但控制台有打印。说明请求成功被网关获取,只是没有对该请求进行请求转发。
忽略某些路径
如果需要更细粒度的控制,如想代理某个服务,又想防止这个服务内的某些路径被访问。可以使用 ignored-patterns 来指定正则表达式来指定需要忽略的路径。
修改网关配置文件,添加路径忽略。
zuul:
  ignored-patterns: /**/**use**/**  #表示忽略所有请求路径中带有use 的请求
运行测试:
访问没带有 use 的请求路径:
访问带有 use 的请求路径:
控制台无打印。
网关集群
Zuul可以配合nginx搭建网关集群。只要在nginx的配置文件nginx.conf里配置多个zuul地址:
http {
  	upstream myhttpServer{
#配置多个zuul地址
	server localhost:8087;
	server localhost:8086;
	}
	server {
		listen       80;
       server_name  www.zpc.com;
		location / {
            proxy_pass   http://myhttpServer;
            index  index.html index.htm;
        }
	}
}